Exploding Paper Pocket Box Tutorial

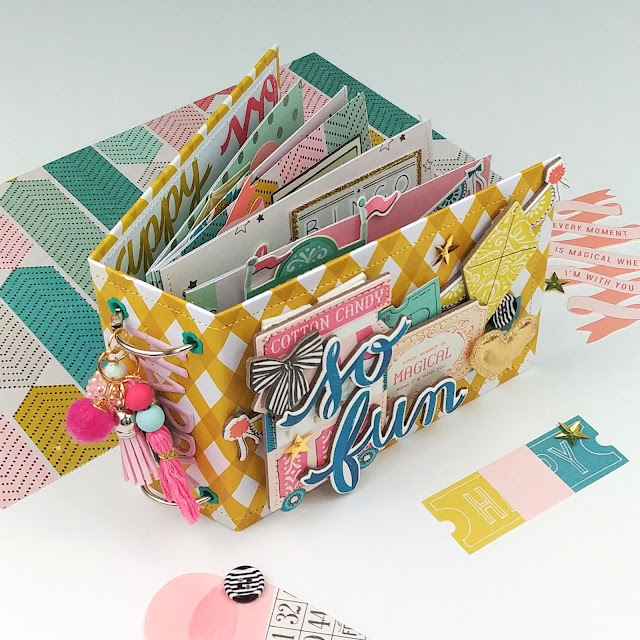
Hello crafty friends! In this post I'd like to share with you how I put together this cute paper box that unfolds or "explodes" when the lid is taken off. Not only is it fun and interactive, it also has four pockets inside that can hold small gifts, trinkets, or photos! How fun is that?!
You can find a process video and tutorial on this project HERE.

The base of this project requires just two pieces of paper:
Box - 12 inch by 12 inch | Score at 4 inch and 8 inch, rotate 90 degrees and score at those marks again
Lid - 8.25 inch by 8.25 inch | Score at 2 inch on all four sides
After folding up on the score lines of your box, carefully cut out the four large squares in each corner. Be sure to save these scraps for another project! For the lid, fold up on the score lines and then turn the four squares into tabs. Use those tabs to adhere the lid into a basic box shape. Fold up the panels of your box paper and add the lid to the top--this is how our entire project will close.

The measurements for the pockets are as follows. Keep in mind that you will need four pieces:
Pocket - One piece of paper that measures 5 inch by 12 inch | Score on 5 inch side at 1 inch on both sides | Score on 12 inch side at 4 inch, 5 inch, 9 inch, and 10 inch.
To turn this template into a pocket, cut the small square and the small rectangle off on both sides of the end that has them. This will be the lid of the pocket. Then, turn the two squares in the middle of the template into tabs and use those to assemble the pocket. I recommend watching my process video for more details on this.

After that, just glue all four of your pockets into the box. Start by adhering one pocket to the left most edge of one of the panels of the box. Follow this pattern until all of your pockets are glued into place and then it's time to embellish!
Thank you so much for stopping by the blog today to read about this project! I hope you feel inspired! Be sure to check out the process video I have on this project for more details by clicking the link up above! Take care and happy crafting!

Comments
Post a Comment