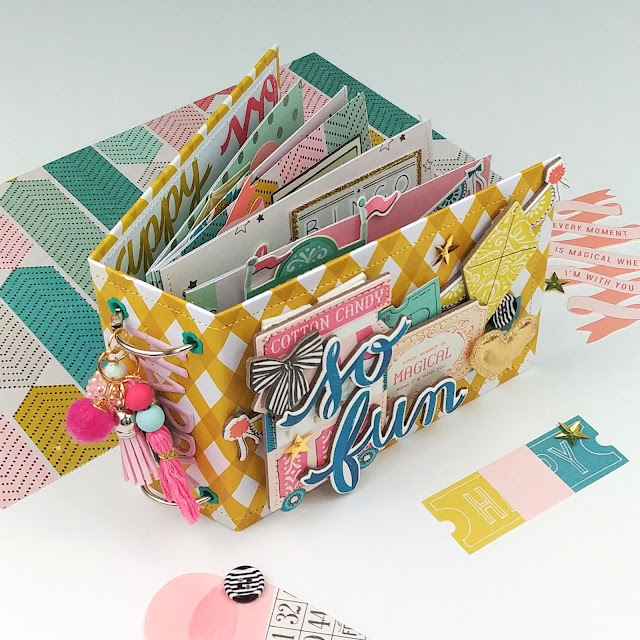
Binder Style Mini Album with Pocket Pages
Hey crafty friends! Binder ring mini albums are some of my favorite to make and are a staple in my mini album collection. They're both easy and quick to make while being super cute and interactive! The best of both worlds!
You can find a tutorial and process video for this project HERE.
For the base of this album you will need 3 pieces of chipboard. The measurements are as follows:
- Two pieces for the covers that measure 4.5 inch by 6 inch
- One piece for the spine that measures 2 inch by 4.5 inch
To wrap your chipboard you will need:
- Two pieces of paper that measure 6 inch by 12 inch. Glue these together end to end and use this extra long piece of paper to wrap your chipboard.
Add the spine to the seam of this paper and the cover pieces to both sides of it. Then trim the short sides of your paper down so that there is about half an inch of paper left over. Then continue the wrapping process.
To line your album you will need:
- Two pieces of paper that measure 4.25 by 7 inches. Overlap these on the spine of your album and adhere them down.
For the binding you will need:
- Two binder rings that measure 1.5 inch.
- Punch two holes that are 1.25 inch apart near the edges at both the top and bottom of the spine.
- Optional: Four eyelets to reinforce the holes.
For the pages of your album you will need:
- Several pieces of paper that measure 4.25 inch by 11 inch | Fold them in half on the long side and glue or sew the bottom and sides to create a pocket.
Punch small holes on the left most edge of all of your pages and add them to your album. Then just decorate and embellish to your heart's content!
Thanks so much for stopping by the blog today! I hope you feel inspired! Be sure to check out the video linked above for more details on how to make this! Take care and happy crafting!


how are you making the paper looked "stitched" around the edges? thank you.
ReplyDeletesuper!gracias!
ReplyDeleteThis comment has been removed by a blog administrator.
ReplyDeleteWhat size binder rings did you use?
ReplyDelete