Layered Mini Album Tutorial for Sassy Scrapper

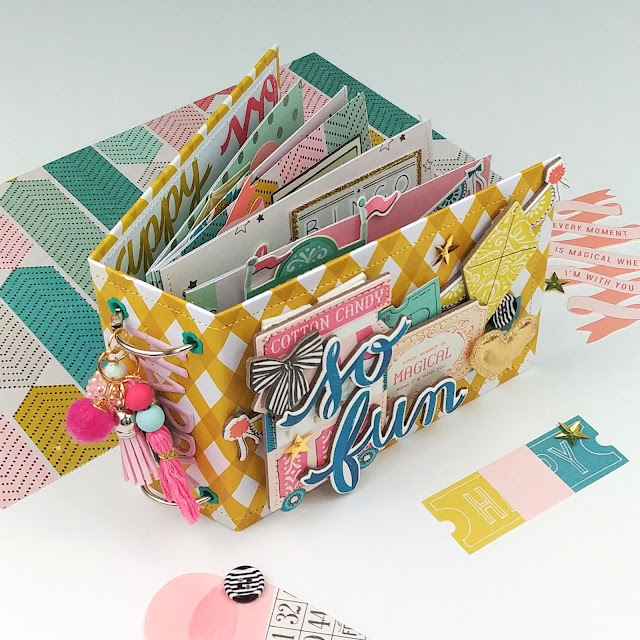
Hi friends! Hope you're all having a splendid, craft-filled day! Today I'm sharing with you how to create this super cute layered mini album using the Round Trip collection from Maggie Holmes. I worked with Sassy Scrapper to bring this project to you, so a big thank you to them and be sure to check them out!

To create the base of this album, I first used two pieces of medium-weight chipboard to create the front and back cover. The front cover measured 2 x 6 inches, while the back cover measured 4.5 x 6 inches. I wrapped the front cover using a 3 x 7 inch piece of paper, and the back cover using a 5.5 x 7 inch piece of paper.


Next, I created the spine of the album. To do this, I scored a 4 x 5.75 inch sheet of paper at one inch on both ends of the 4 inch side. I folded up on these score lines to create a 2-inch spine. I then, for a bit more fun, added some paper flowers to the spine before wrapping it in a sheet of clear acetate. The acetate sheet should measure 5.75 inches and then any desired length. The longer the sheet is, the higher the "bubble" of acetate on the spine will be.

.jpg)
To adhere the covers to the spine I used a strong double-sided tape. I used a ruler to help line the covers up evenly and adhered them down to the tabs of the spine.
I then added the inner lining pieces. The front cover piece measured 1.75 x 5.75 inches, while the back cover piece measured 4.25 x 5.75 inches.

To create the closure for this album, I used a 1.5 x 6 inch strip of paper. I adhered the tail end of it to the back of the back cover of the base, and then tucked the strap up and under the front cover. I secured it down using a velcro dot. If you'd like to forgo the paper strap closure, a nice bundle of twine will hold the album closed and look just as cute!
For the pages of this mini album, I used four sheets of paper cut and scored to the following measurements:
Page 1 - 5.75 x 8.25 inches, score on the 8.25 side at 2.5 and 4.25 inches. Page 2 - 5.75 x 8 inches, score on the 8 inch side at 3 and 4.5 inches. Page 3 - 5.75 x 7.75 inches, score on the 7.75 inch side at 3.5 and 4.75 inches. Page 4 - 5.75 x 7.5 inches, score on 7.5 inch side at 4 and 5 inches.


I stacked the pages from largest gusset to the smallest, one on top of the next. This is how the pages will look when adhered together. Be mindful of the way patterns face when cutting and scoring these papers.
To adhere the pages together, I once again used double sided tape and adhered them in the order I stacked them by adding the tape to the back of each gusset.
To add the entire page structure to the album, I essentially repeated this process and adhered the outermost page gusset to inner spine of the base.

You can find a detailed video tutorial here of how I made this project.


Comments
Post a Comment