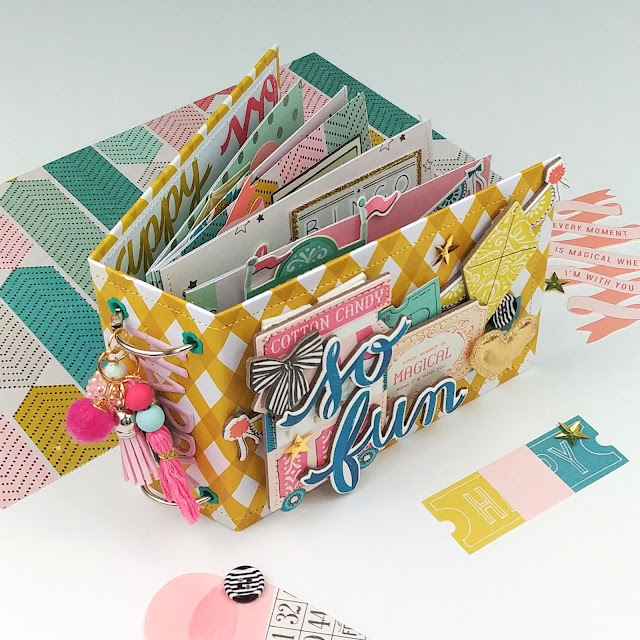
Elastic-Bound Mini Album with Curved Spine

Hi friends! Welcome back to my blog! Today, I'm sharing the details on how to make the base of this chipboard mini album that features a curved spine accent.

Here's a list of all of the materials and their corresponding measurements:
- Two pieces of chipboard: 5 x 6 inches.
- Two pieces of wrapping paper: 6 x 7 inches.
- Two pieces of lining paper: 4.75 x 5.75 inches.
- One spine paper: 5 x 5.75 inches, scored at 1 5/8 inch on both ends of the 5-inch side.
- One curved spine paper: 3 x 5 inches. Use a pencil or scoring tool to curve the paper.
- Elastic or thread, cut to size.
- Pages:
- Large Page: Trim paper to 5.5 x 9.5 inches. Fold in half.
- 3-Panel Page: Trim paper to 4 x 12 inches. Score at 4 and 8 inches. Fold. For added flair, trim the first page and punch a semi-circle tab. This will add more character to the page.
- Pocket Page: Trim down a pocket page to size and fold in half. I used a pocket page for a 6 x 8 album; it had 3 x 4 inch pockets.
- Tags or Journaling Cards Page: Cut tags or journaling cards into pairs. Fold in half.


Start by wrapping the chipboard using the wrapping papers and a strong adhesive. I like to use double-sided tape; it's mess free and holds well, which means the album will last longer!
Set the lining papers aside for now, we'll use them soon.
Attach the edges of the curved spine to the outside of the actual spine. The curved spine is optional. It adds a lot of fun flair to the album, but also makes it harder for the album to lay flat. Try to attach the curved spine to the spine as evenly and centered as you can. Use a strong adhesive.


Next, attach the panels of the spine to the inside edges of the wrapped covers. Take your time doing this, getting it as even as possible really gives the album a more finished look.
Then, add the lining papers to the inside of the covers. Again, use a strong adhesive!
Finally, thread either elastic, thread, or yarn through the curved spine and tie it into place with a double-knot. This is how the pages will bind to the album.
Add as many or as few pages as you'd like. I did four. Envelope pages are always a fun addition to include for more storage (just a thought!).

You can find a video tutorial for this project over on my YouTube Channel: here. If you have any questions, feel free to comment here or there, or reach out to me on Instagram!
Thanks for visiting my blog today. Take care and happy crafting!

Gorgeous!! So Excited to see new tutorial and post from you!! Love it!! everything so pretty and fun to make as always 😍💛
ReplyDelete